How to Install windows 7 from Usb Flash drive
1. Plug the USB key in.
2. If AutoPlay opens a pop-up for the USB key, then just close it.
NOTE: Make note of what the drive size is for the USB key for use in step 6 below. You can also open Computer (step 19) to see what the drive size is to. For example, mine is 3920 MB. (See screenshot below)
3. Open an elevated command prompt.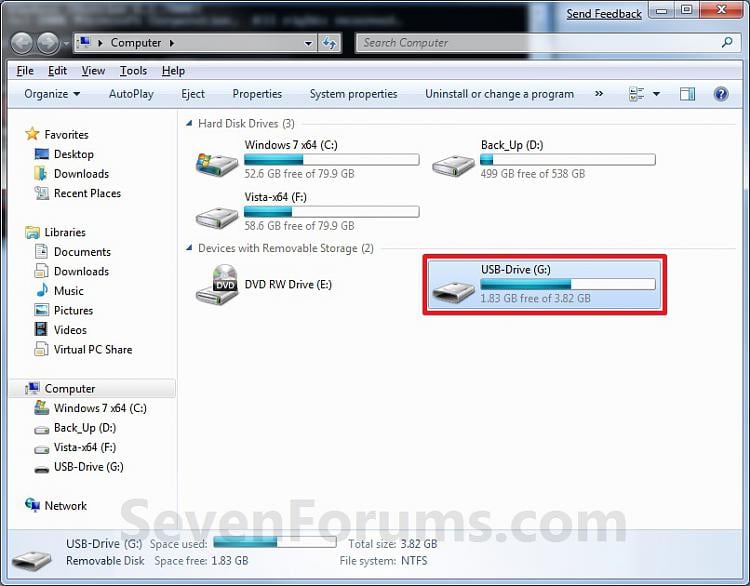
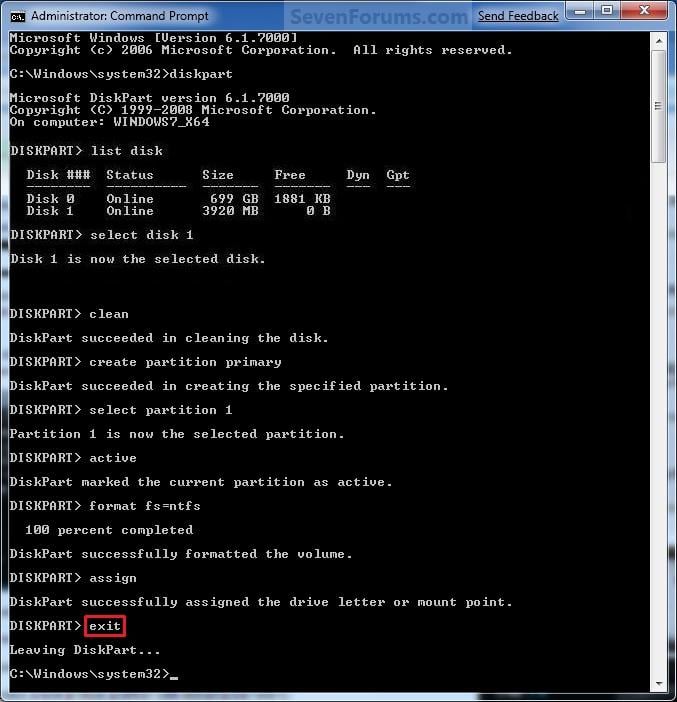
4. In the elevated command prompt, type diskpart and press Enter. (See screenshot below)
5. In the elevated command prompt, type list disk and press Enter. (See screenshot below)
NOTE: Make note of what disk # your USB key is listed as to use in step 6 below. You can also look for the drive size (step 2) of the USB key to help ID the disk number. For example, mine is listed as Disk 1 here for the 3920 MB disk.
6. In the elevated command prompt, type select disk # (your USB disk #) and press Enter. (See screenshot below)
NOTE: For example, my USB key is listed as Disk 1, so I would type select disk 1 and press Enter.
7. In the elevated command prompt, type clean and press Enter. (See screenshot below)
8. In the elevated command prompt, type create partition primary and press Enter. (See screenshot below)
9. In the elevated command prompt, type select partition 1 and press Enter. (See screenshot below)
10. In the elevated command prompt, type active and press Enter. (See screenshot below)
11. In the elevated command prompt, type in the command below to format the USB as NTFS or FAT32, and press Enter. (See screenshot below)
NOTE: This may take a few moments to finish formatting the USB key.
You can substitute Windows 7 within quotes in the commands below with whatever name (drive label) you would like to have displayed for the USB drive instead.
FAT volume labels
FAT volume labels
- If you have an UEFI instead of BIOS motherboard, then you will need to use FAT32 and not NTFS.
- Volume labels can contain as many as 11 characters and can include spaces but no tabs.
- Volume labels cannot contain the following characters: ? / \ | . , ; : + = [ ] < > "
- Volume labels are stored as uppercase regardless of whether they contain lowercase letters.
- Volume labels can contain as many as 32 characters.
format fs=ntfs label="Windows 7" quick12. If AutoPlay opens a pop-up for the USB key, then just close it.
OR
format fs=fat32 label="Windows 7" quick
13. In the elevated command prompt, type assign and press Enter. (See screenshot below)
NOTE: This will assign a new drive letter to the USB key. Make note of the new USB drive letter to use in step 22 below. For example, mine is now H.
14. If AutoPlay opens a pop-up for the USB key, then just close it.
15. In the elevated command prompt, type exit and press Enter. (See screenshot below)
NOTE: This will exit you from DiskPart from step 4.
16. Close the elevated command prompt.
17. Insert your Windows 7 installation DVD into the DVD drive.
18. If AutoPlay opens a pop-up for the Windows 7 installation DVD, then just close it.
19. Open the Start Menu, right click on the Computer button, and click on Open.
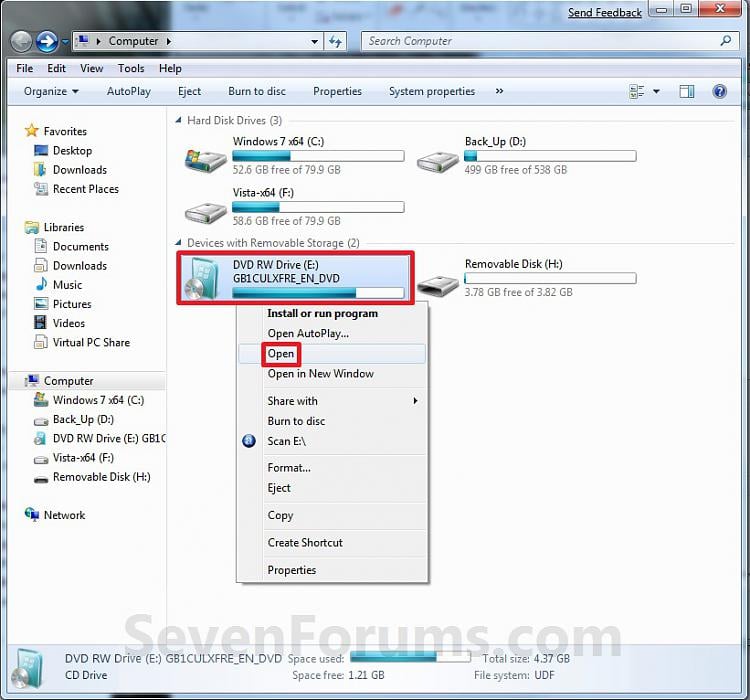
20. Right click on the DVD drive (ex: E: ) that has the Windows 7 installation DVD in it, and click on Open. (See screenshot below)
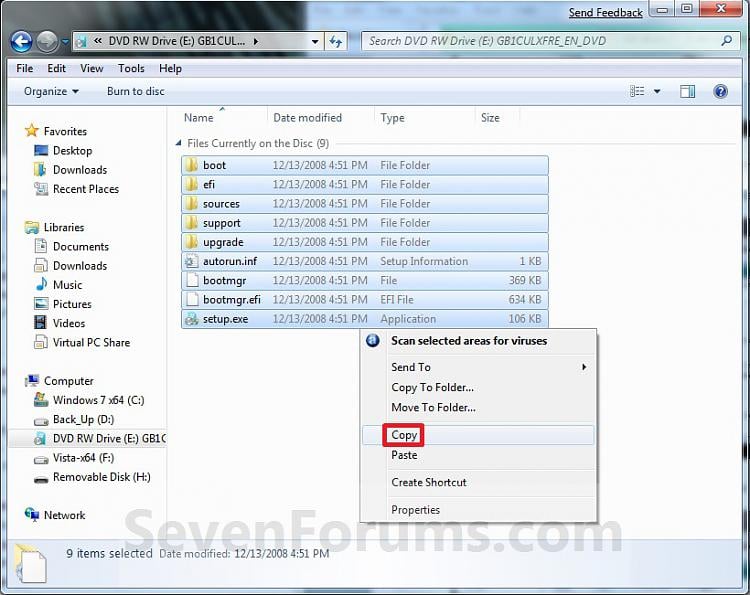
21. Highlight all of the contents, right click on the highlighted contents, and click on Copy. (See screenshot below)
NOTE: You will need to copy all of the files and folders on the Windows 7 installation DVD to the USB key.
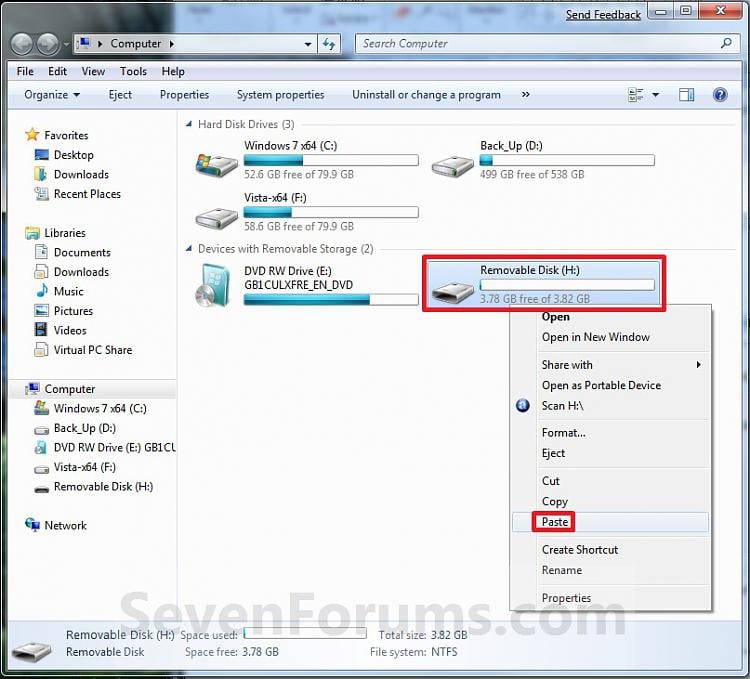
22. Go back to Computer, right click on the USB key drive (ex: H ), and click on Paste. (See screenshot below)
23. The contents of the Windows 7 installation DVD will now start copying over to the USB key. (See screenshot below)
NOTE: This may take a few moments to complete.
24. When finished, you can close the Computer window and unplug the USB key.
25. You now have a Windows 7 Installation USB key.


